Raspberry Pi Pico Project
Code, wiring, and instructions for your OLED sensor hub.
Instructions
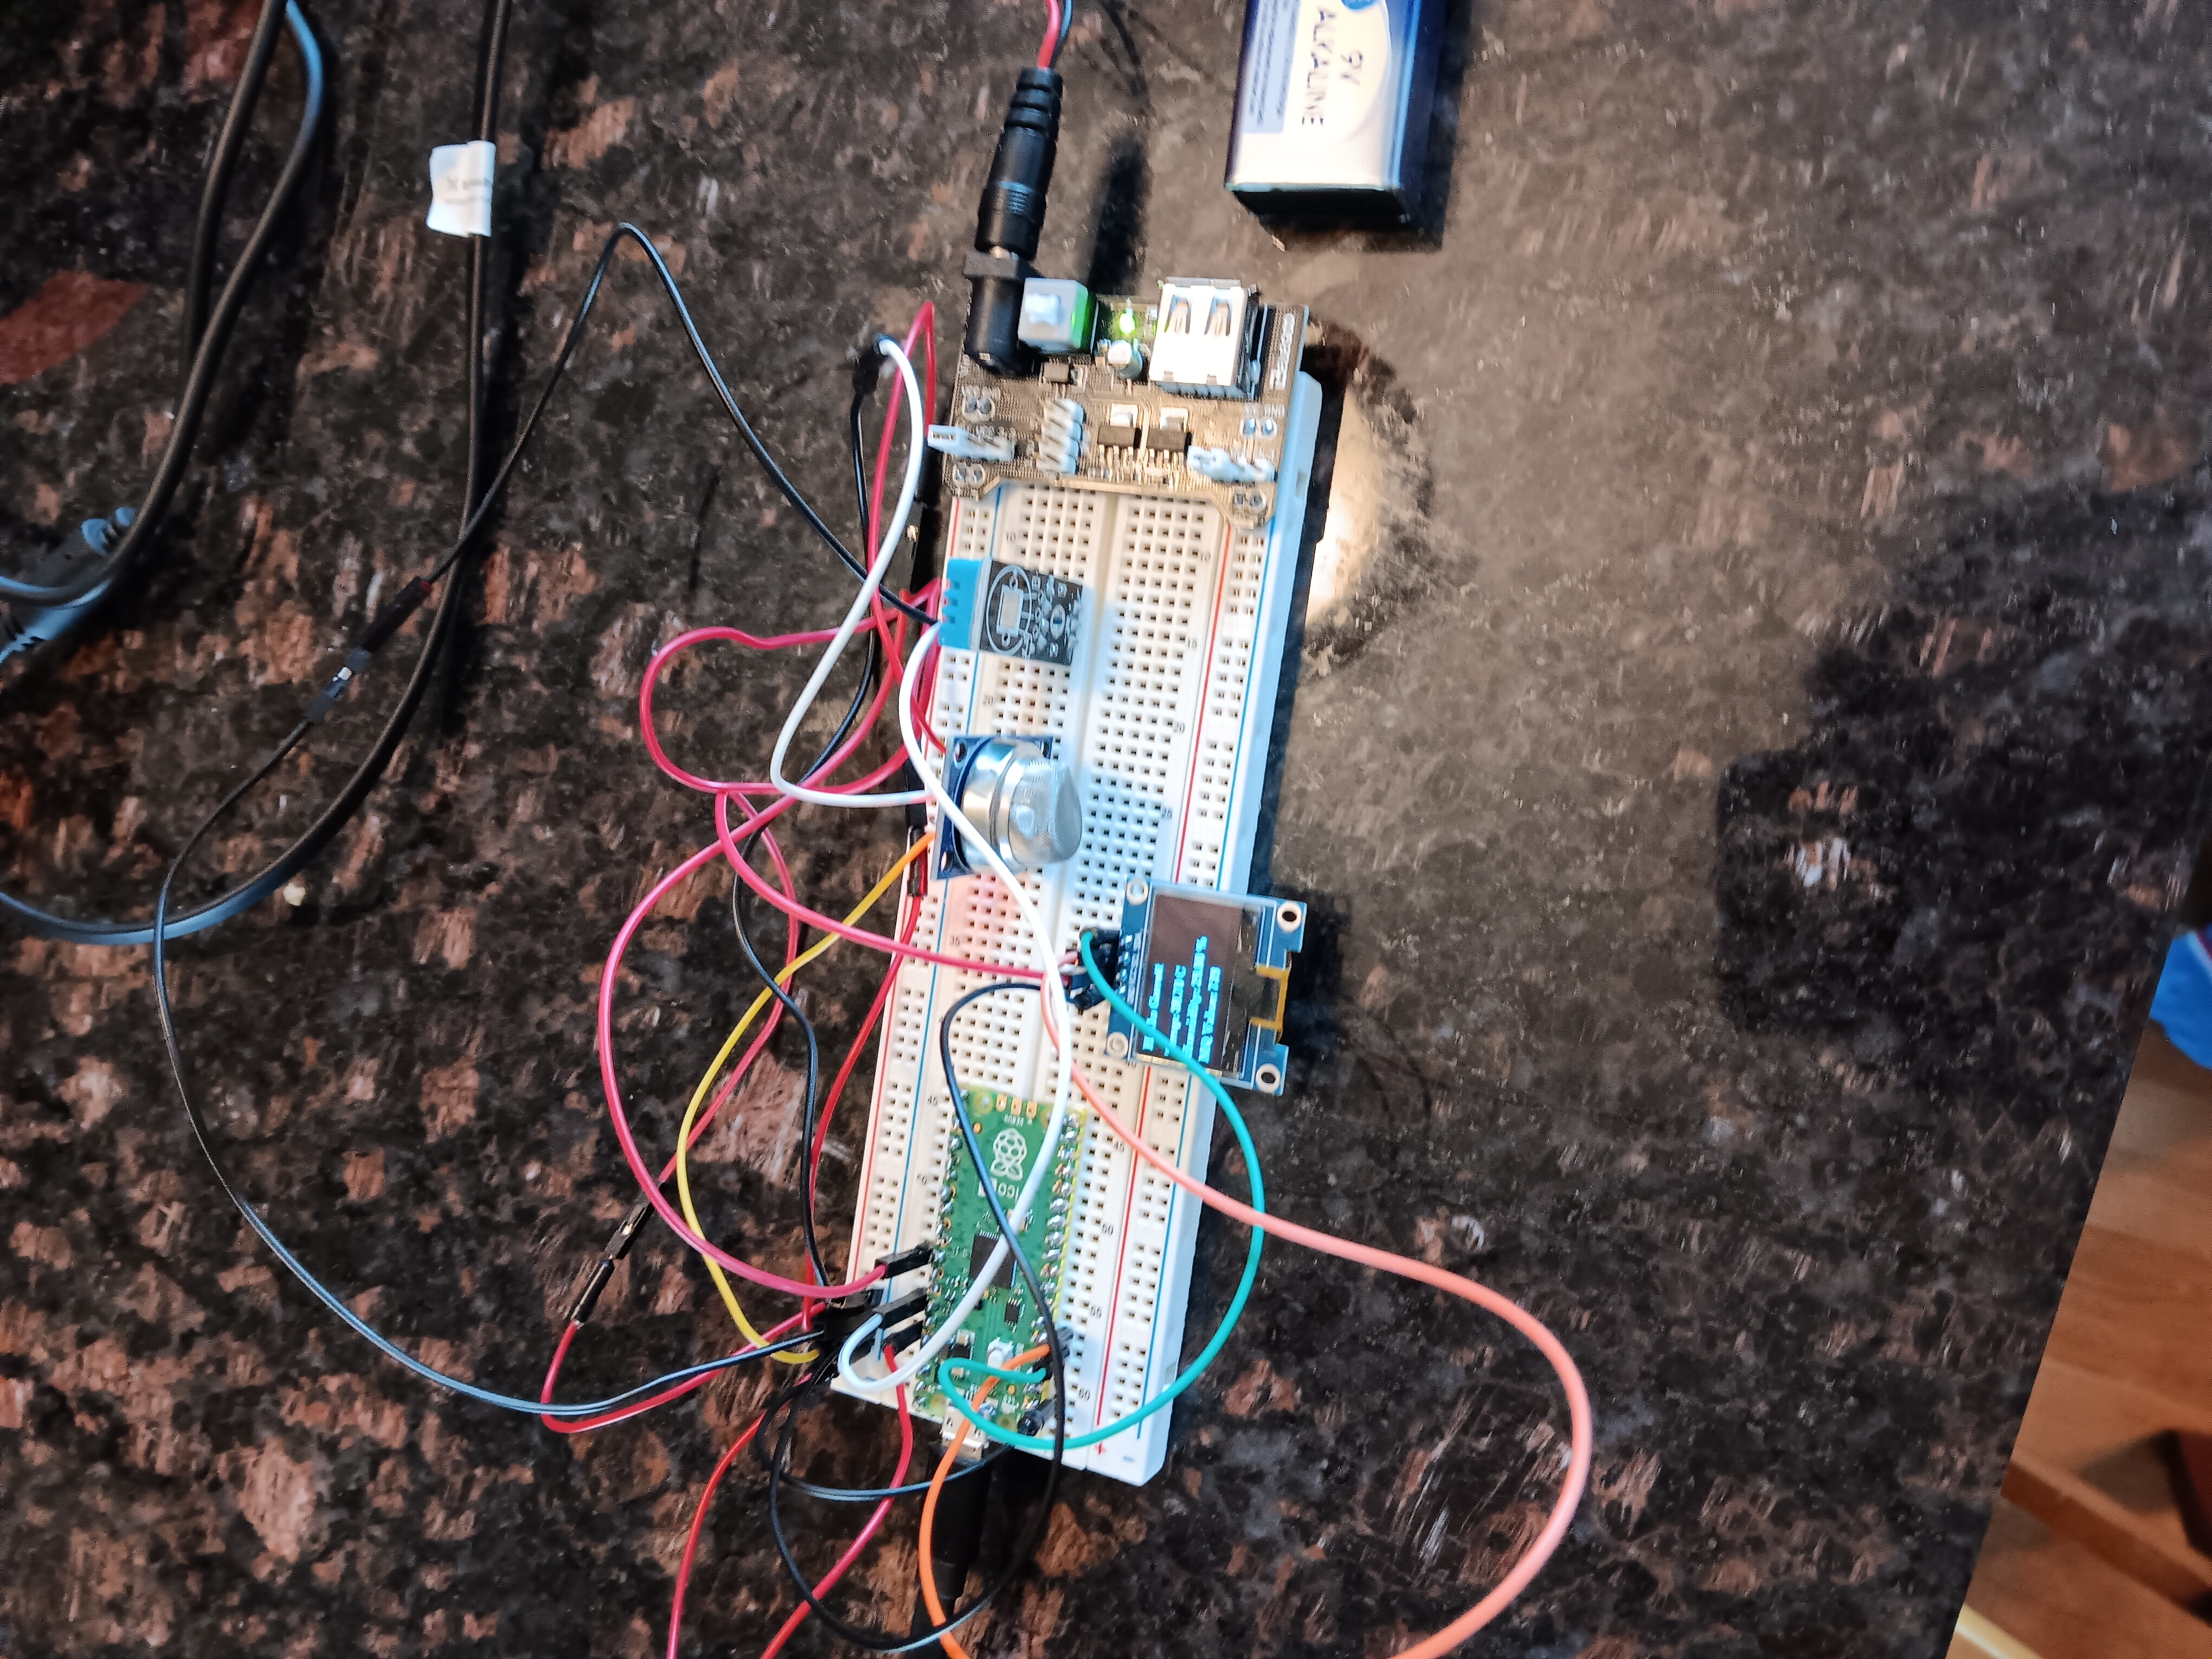
This Arduino-compatible code reads data from a DHT11 temperature/humidity sensor and an MQ gas sensor, displaying the results on an SSD1306 OLED screen connected to a Raspberry Pi Pico.
Project Code
#include <U8g2lib.h>
#include <DHT.h>

// Define sensor pins
#define MQ_PIN 26      // Analog pin for MQ gas sensor
#define DHT_PIN 28     // Digital pin for DHT11 sensor

// Initialize U8g2 for the SSD1306 OLED display (I2C)
// This is a common constructor; adjust if your screen is different.
U8G2_SSD1306_128X64_NONAME_F_HW_I2C u8g2(U8G2_R0, /* reset=*/ U8X8_PIN_NONE);

// Initialize DHT sensor. Change to DHT22 if you are using that model.
DHT dht(DHT_PIN, DHT11);

void setup() {
    Serial.begin(115200); // Start serial for debugging

    // Initialize the OLED display
    u8g2.begin();
    u8g2.clearBuffer();
    u8g2.setFont(u8g2_font_ncenB08_tr);
    u8g2.drawStr(0, 15, "Initializing...");
    u8g2.sendBuffer();

    // Initialize the DHT sensor
    dht.begin();
    Serial.println("DHT sensor initialized.");
    delay(1000); // Wait for sensors to stabilize
}

void loop() {
    // Read sensor values
    float humidity = dht.readHumidity();
    float temperature = dht.readTemperature();
    int mqValue = analogRead(MQ_PIN);

    // Check if DHT read failed (common if sensor is not connected)
    if (isnan(humidity) || isnan(temperature)) {
        Serial.println("Failed to read from DHT sensor!");
        u8g2.clearBuffer();
        u8g2.setFont(u8g2_font_ncenB08_tr);
        u8g2.drawStr(0, 32, "DHT Read Error!");
        u8g2.sendBuffer();
        delay(2000); // Wait before retrying
        return;
    }

    // Clear buffer for new data
    u8g2.clearBuffer();

    // Set font for display
    u8g2.setFont(u8g2_font_profont12_tr);

    // Display Welcome Message
    u8g2.drawStr(0, 12, "Welcome to Coding");

    // Display Sensor Data
    char tempString[16];
    snprintf(tempString, sizeof(tempString), "Temp: %.1f C", temperature);
    u8g2.drawStr(0, 30, tempString);

    char humString[16];
    snprintf(humString, sizeof(humString), "Humidity: %.1f %%", humidity);
    u8g2.drawStr(0, 44, humString);

    char gasString[16];
    snprintf(gasString, sizeof(gasString), "Gas Level: %d", mqValue);
    u8g2.drawStr(0, 58, gasString);

    // Send data to the OLED
    u8g2.sendBuffer();

    delay(2000); // Update every 2 seconds
}
Wiring Diagram